Monday, August 14, 2017

Nearly done with Tidalforce S-750X battery and wheel upgrade

Well, I spent last night finishing up the upgrade to Rick's S-750X bike.

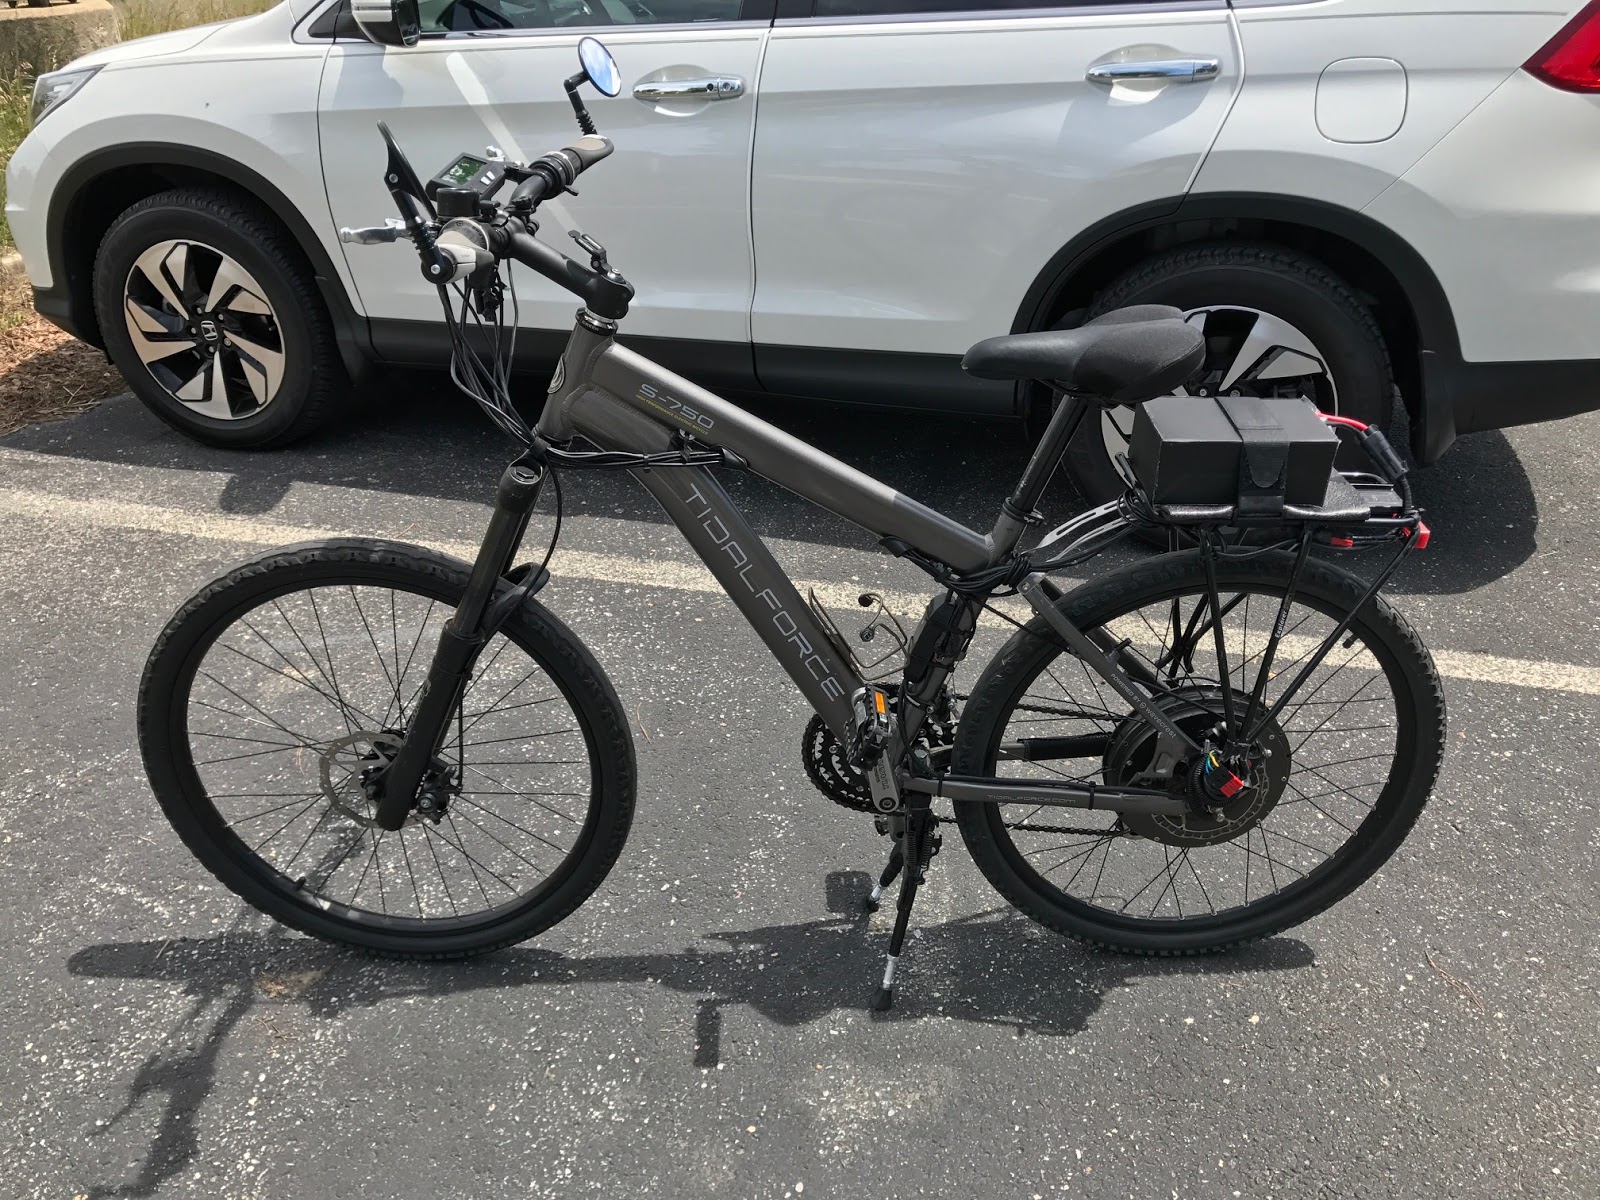
I replaced the front brakes with an Avid BB7 disc brake. I mounted the Grin Technologies Cycle Analyst and ran the wires back to the mount the shunt before the motor/controller. I stuffed the Turnigy Multistar battery into the Topeak MTX bag. Ran the power to the connector on the CA shunt and powered everything up. It all went together like a charm. I was able to take it for a 10 mile ride and hit a top speed of 30MPH! The bike felt great!

Here's all the tie wraps used to snug everything down to the frame and the chainstay. It looks much better when it's cleaned up!


Here's the rear quarter view of the bike before the Cycle Analyst shunt installation.


Tuesday, June 27, 2017

Cleaning up and upgrading the batteries for a friend's Tidalforce S-750X

Rick dropped by over the weekend to have his S-750X upgraded from the dead front hub battery to the 16 or 20 Ah battery. He had it in storage for a while so it was a bit grungy. I've got quite a bit of work to do on it. Building the 36V pack, installing the Topeak rear rack and bag, installing the Cycle Analyst...


Friday, June 9, 2017

Went for a ride at work...

I took my bike to work yesterday since the weather was so perfect. I had a chance to take a break and went for a ride. I passed a police officer sitting by the side of the road and about a mile down the road, he sounds his siren and pulls me over! Another rider riding by said, "You're pulling him over? For what?" My thoughts exactly!

He was just curious about the bike and how it was going so fast.

I gave him a quick tour of the bike. I didn't offer to give him a ride, though...

I took my S-750C (for Crystalyte) bike. Crystalyte HS3540 motor with the Multistar 16Ah pack. It has the eBikes.ca BAC500 FOC controller and a Cycle Analyst V3. I also have eBikes.ca lights front and rear. I have disc brakes front and rear as well.


Tuesday, June 6, 2017

Two electric vehicles!

I found this older photo when I happened upon a Tesla Model X in the neighborhood.

One is slightly more expensive than the other! :-)


Monday, March 6, 2017

New packs mounted on a Tidalforce M-750X and a red Tidalforce iOX

My neighbor brought over his two bikes to have the batteries installed on them. He also bought two Cycle Analyst meters. They fit great and ride great.

This is a terrific and easy upgrade for his bikes.


Completed 16Ah packs

I completed three packs for a neighbor and myself. These are fairly compact and pack a lot of punch. 16Ahs to be exact. Twice as much as the original Tidalforce hub battery has, to be exact. Yet, the pack weighs about 1/4 of the original Wavecrest front hub battery. These weigh 7.5 lbs whereas the WC front hub battery weighs over 30 lbs with the casing and wheel.


Wednesday, February 22, 2017

Making some new 16Ah packs for a neighbor's Tidalforce bikes

A neighbor who I've known for a couple of years asked me to make some auxiliary packs for him to use with 3 of his 6 TF bikes. He ordered all the parts needed to make the packs and I picked them up from him.

It's a good thing he did because the site where he bought the packs sold out fairly quickly.

Here are some pics of the raw cells and some pics of them partially assembled before the cases and connectors were fully completed. pardon my messy and overcrowded workbench.


Wednesday, February 15, 2017

Universal Car Battery Terminal Clamp Clips

I need to acquire a good sized sealed lead-acid battery (12V car battery) in order to use the new KaeptnBalu Arduino based battery tab welder.

However, the battery leads that came with the welder have relatively small openings to attach them to the terminals on a normal car battery. In KaeptnBalu's video of how he builds the welder, I noticed that he had adapters on his battery terminals which allowed the use of the smaller openings of his welding tips. I did a quick look on Amazon and saw what I think are the exact same adapters!

They are extremely inexpensive and ship for free!

https://www.amazon.com/gp/product/B01K4HGX22


Sunday, February 12, 2017

Kaeptnbalu's Arduino based battery welder arrived!

I've been wanting an inexpensive yet versatile battery welder for a while now and this sure seems to fill the bill. All that is needed is a solid 12V battery, usually a sealed lead acid (SLA) car battery and a pedal foot switch. I have a electric piano pedal that should work with a slight modification. I need to pick up a SLA somewhere. Oh, I also need a 5V microUSB power brick (used for most mobile phones these days).

The build quality is quite solid and professional and the included welding tips and the heavy duty heat sink bar are also much appreciated. Well done, Kaeptnbalu!

Can't wait to put it to work.


Wednesday, February 1, 2017

DIY Arduino Battery Welder for sale!

Selling a DIY Arduino Battery Welder PCB Set...

I bought a printed circuit board set to make an Arduino based battery welder, however, the completed and tested system became available and so I've decided to buy the assembled system. Now I have a PCB set to sell.

See the listing here:

https://endless-sphere.com/forums/viewtopic.php?f=31&t=86252

Here's the text...

I purchased this Arduino based battery spot welder PCB set and then opted for the fully built unit. With some fairly inexpensive components and some soldering and assembly skills, you can make this into a battery spot welder for low $$$. I paid $6+1.70 for shipping. It's still in the original packaging and I'll let it go for $7.00 shipped to the continental USA.

Where I bought it from:
https://www.tindie.com/products/KaeptnBalu/diy-arduino-battery-spot-welder-pcb-set/
http://blog.tindie.com/2017/01/arduino-based-spot-welding/?utm_source=Tindie+Community&utm_campaign=7772515db8-FeaturedProduct_011917

KaeptnBalu's github page with all of the parts list and assembly drawings.
https://github.com/KaeptnBalu/Arduino_Spot_Welder

Instructables page;
http://www.instructables.com/id/DIY-Arduino-Battery-Spot-Welder/

Another website featuring this board:
http://ralphshobbyshop.com/?page_id=609


This is what it will look like assembled.