I hadn't thought much about it, but looking at the new thru axle hub with the 9mm adapter installed, it looked quite wide. I took out my digital calipers and measured it.
The first picture is of the 20mm thru axle.
Second picture is the measured width of the axle. 120mm
Third picture is of a standard front wheel QR hub from one of my Tidalforce bikes. 100mm!
The 20mm front hub is 20% wider than a normal QR hub can handle!!,
Surprise, surprise, surprise!
Sunday, March 31, 2013
Family Portrait of Electric Bike Motors
I have the Crystalyte 3540 (I believe) motor mounted on the bike and I had my Tidalforce as well as E-bikekit motor sitting nearby so thought I'd take a picture. As you can see, the Tidalforce is massive in size compared to the two others. It is truly built like a tank. The quality of the castings is very high on the Tidalforce. In second place is the Crystalyte. It is very solidly built and similar to the Tidalforce motor, is very quiet. In 3rd place is the E-bikekit motor. It's well made, but has pressed panel side covers (I believe) and doesn't quite match up to the other two. However, it is (by far) the least expensive motor and a great entry level motor. I know because this type of motor was my first electric bike motor and I'm very fond of it. It also does amazingly well when run at higher voltages, which is surprising considering it's low cost!
Anyway, here's the picture.
Anyway, here's the picture.
Labels:
9 continents,
9C,
Crystalyte,
electric hub motor,
Tidalforce
Saturday, March 30, 2013
Mavic QR 20mm to 9mm adapters arrived!
When I received the Crystalyte motor with matching front wheel, the front wheel was missing the 20mm thru axle. I couldn't use the thru axle either but needed some way short of switching the hub to a QR hub!
Googling around, I spotted these at Pricepoint.com.
http://www.pricepoint.com/Brand/Mavic/Mavic-20mm-to-9mm-Q-R-Adapter.axd
They fit perfectly into my axle-less front wheel and look great. The bearing spins freely and the adapters are a very precise fit. It's a great solution for low $$$.
Googling around, I spotted these at Pricepoint.com.
http://www.pricepoint.com/Brand/Mavic/Mavic-20mm-to-9mm-Q-R-Adapter.axd
They fit perfectly into my axle-less front wheel and look great. The bearing spins freely and the adapters are a very precise fit. It's a great solution for low $$$.
Did some work last night...
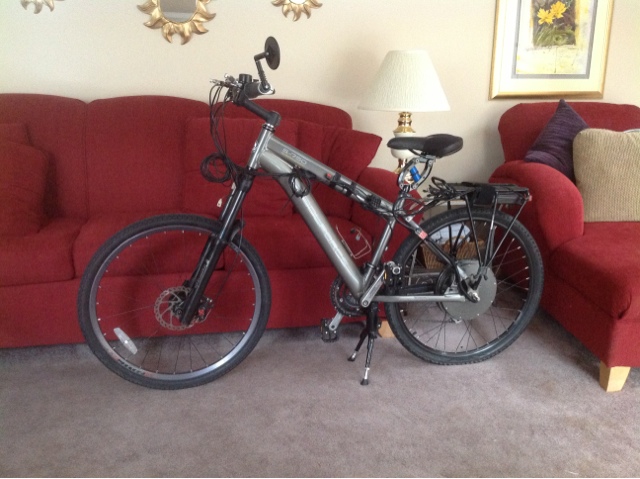
I worked on my Tidalforce S-750C build last night. It doesn't look very different but,
Removed the Tidalforce console, brake levers, throttle
Installed the folding pedals
Changed the tire and tube
Installed the Thudbuster LT seatpost
Installed the ebikes.ca taillight
Mounted the controller which fits very nicely under the Topeak rack
Switched out the brake levers
Installed the thumb throttle
Installed the Mirrycle mirror
Routed the brake cables and throttle wires through the frame
Pics here:
Labels:
controller,
Crystalyte,
folding pedals,
HS3540,
Mirrycle,
motor,
pedals,
rear motor,
taillight,
Thudbuster,
Tidalforce
Monday, March 25, 2013
Videos of the Crystalyte motor/controller setup and a speed test
I did a video of a tour of the motor/controller/battery/APM/throttle as well as an unloaded speed test of the combination using my old/saggy/tired (less than fully charged) Bosch Fat Pack batteries.
Here's the setup:
Here's the setup:
Here's the unloaded speed test of the motor:
This motor/controller combo is quite amazing in that it can reach 66 mph unloaded!
Labels:
66 mph,
APM,
console,
Crystalyte,
electric hub motor,
speed,
testing,
video
Pix of Crystalyte 35 series motor on my Titanium S-750 frame
I'm still testing out the new motor so am trying it out on my Tidalforce S-750 frame. Here are a couple of pictures. I've simply installed the motor into the rear dropouts and tested it. I haven't actually ridden it yet. It's snowing here in Washington, DC...
Friday, March 22, 2013
Correction! Crystalyte 35 series motor versus the Tidalforce motor
Correction:
I mistakenly called my new motor a "5" series motor when in reality it is a "35" series motor. Forgive me, I must have been dreaming and wished it so! anyway, back to the show!
I put both motors side by side for a comparison shot...
I mistakenly called my new motor a "5" series motor when in reality it is a "35" series motor. Forgive me, I must have been dreaming and wished it so! anyway, back to the show!
I put both motors side by side for a comparison shot...
Labels:
Crystalyte,
electric hub motor,
motor,
photos,
Tidalforce
Friday, March 15, 2013
Crystalyte 35 series motor/controller/batteries for my M-750X build
The motor/controller/batteries for my M-750X build came in yesterday thanks to Scratch1973. It's quite a kit for the price. I checked all 3 batteries and they were out of balance. Two of the packs are somewhat damaged but it looks as if they are held in a metal outer case under the thin shrinkwrap plastic cover. They do not have balance leads which is surprising. So I'll be disassembling the packs, adding the JST-HX balance wires, testing each cell of each pack, and reassembling it perhaps into a different configuration.
I liked that the battery had a pre-charge resistor. This eliminates the possibly huge ZAP that happens when you hook up a large voltage to a controller.
Here are the pics.

I liked that the battery had a pre-charge resistor. This eliminates the possibly huge ZAP that happens when you hook up a large voltage to a controller.
Here are the pics.

Labels:
APM,
batteries,
Bontrager,
controller,
Crystalyte,
LiPO,
photos,
Sensorless
Subscribe to:
Comments (Atom)


